 The first thing you'll want to do is primer everything with a nice automotive primer. I would probably advise using a self etching metal primer for the metal can part. It will prevent it from scratching easily. Also, prior to painting the metal bits, give it a good sanding with some 300 grit sand paper to smooth it out and then clean with acetone.
Note: In this shot I have some spacers I used to build this Theo. The spacers are used to hold the lights.
 After primering the body, you'll want to paint the body. For this I used Model Masters Citrus Yellow Metallic Auto Lacquer, and then dusted it with a light coat of silver to soften it up.
 Once everything is painted you can begin assembly. On the mirrored back, I glued the spacers I made over each of the holes. In future builds, I probably would use a smaller spacer, but this is up to the builder how you want to attach the lights in place.
The center disk is one of the tricky pieces. First thing you will want to do is put the transparency between the two disks so that it is centered. Once you have done that trim all of the excess off, and then once that is done, remove the transparency and then cut it so that the transparency is about 1/8" smaller than the disks. This prevents wrinkles. Reassemble the disks and use a little hot glue to hold it in place.
 The center disk is the first one that gets put into place. I would probably suggest putting it no further than 3/4" in from the top, but probably closer to about 1/2" in. Depending on how you do your lights, you'll need plenty of space behind the mirror.
Oh, before you put your center disk in, lay the completed assembly on the mirror and figure out where your eyes will do. There are 8 holes around the edge for the body lights, two holes at both the top and bottom for the facial features, and one hole on each side for the eyes. The face holes (the 2 pairs) should be at the 12 and 6 position. You'll want to mark the eye holes and drill them through the center disk as shown to the left so you can light the eyes. Those should be the only holes you'll need to drill.
 This small detail, the upper eyebrow goes on the back side of the center disk. All other details go on the front. It lines up with a graphic on the transparency.
 As noted, all other details go on the front.
 The top plate gets mounted flush with the top of the can. I have used a hot glue gun entirely on this project.
 I used a $3 light kit from Hobby Lobby for the lights. It has 20 incandecent bulbs. 2 each for the 8 body lights and 1 for each eye. If you're doing the math there are 2 left over which I don't use. I also (not shown here) take the switch out of the pack, cut the wires and lengthen the wire so I can make the switch mounted on the body. This requires (also not shown) cutting a notch for the switch to sit in.
When positioning the mirror disk, have it as close to the middle disk as possible. You will need as much room for the lights as you can get if you use this light kit.
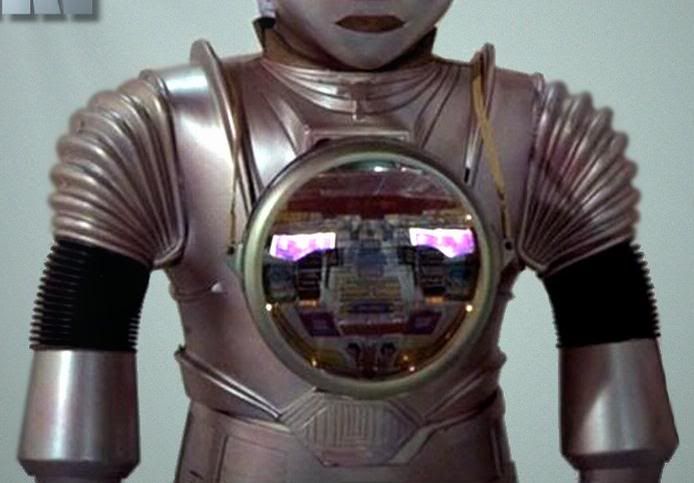
 This is the finished piece minus the side mounts. The IC's are simply glued in place and the front and back cover held on by pressure. Easy cheesy.


